Friday, March 1, 2013

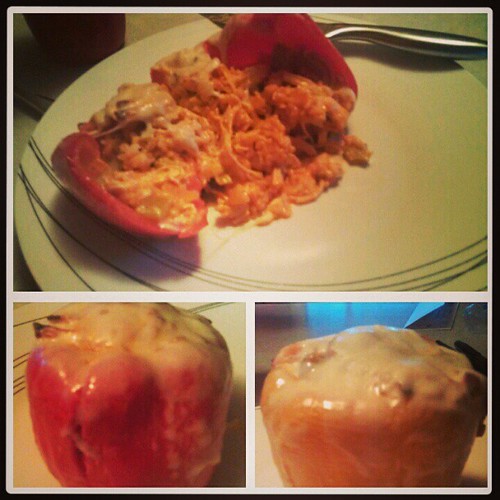
Buffalo Chicken Stuffed Peppers

226948_779634191084_1900414272_n

I posted this picture on instagram and Facebook and immediately got requests for the recipe. Unfortunately the recipe I followed was very poorly written (missing multiple steps in the process) and I tweaked it quite a bit. So I decided the best course of action was to write my own recipe and post it here!

Ingredients:
2 Skinless Boneless Chicken Breasts, cooked and shredded
1/2 C. Brown Rice
1/2 C. Celery
1/2 C. Onion 
1 C. Frank's Hot Sauce (You can use another brand, but it won't be as good ;-))
1 1/2 Tsp. Garlic Powder
2 Tsp. Parsley
1/2 C. Blue Cheese
1/4 C. Ranch Dressing
6 Slices  Muenster Cheese (Provolone, Swiss, or Pepper Jack would also be good).
3 Whole Bell Peppers

Directions:
Preheat the oven to 350 degrees. Cook the rice according to the package directions. Saute the onions and celery until soft. Add all the other ingredients except the blue cheese, muenster, and bell peppers. Simmer for 15 min. Add the blue cheese and ranch. Cut the stems off the peppers and clean out the seeds. Lay a slice of cheese in the bottom of each pepper. Fill the peppers with the meat mixture until heaping. Place in a baking dish and bake for 30 min. Place another piece of cheese on the top and cook for an additional 5-10 min. Until the cheese is melted and the peppers are soft. 


If you like Buffalo chicken, you should check out my Buffalo Chicken Calzone recipe. It is yummy and quick.

Love,
Natalie

Tuesday, January 22, 2013

Felt Baby Blocks

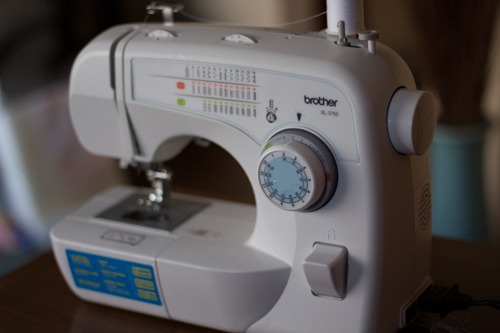
Well folks I entered the wild world of sewing when this beauty showed up for Christmas from Mama Mayhem.

IMG_3141.jpg

I did have a sewing machine prior to that that I had picked up at a garage sale for $15. It was SUPER old. It came with a servicing receipt  from 1963! My old machine was persnickety and more frustrating than fun to use. I did bust it out from time to time. For example, I used it to make the roman shades in our bathroom revamp. Most recently I had tried to use it to make this pillow, but I got so frustrated with my machine being crappy that I ended up sewing it by hand--not fun.

Enter my new shiny flashy machine. I love it. And I love my new baby. So I decided by first project would be something for my babe.

IMG_3181.jpg

There they are together. I love it how it looks like Max is winking!

It is a fairly simple process. I used felt fabric in three different patterns, but I think more patterns would have been more fun. The foam I got was 3" thick so my blocks are 3" square.

IMG_3157.jpg

I cut the fabric in 3 1/2" squares to allow for 1/4" seams.

IMG_3139.jpg

If you don't have  a rotary cutter, go buy one now. You will love yourself for it. And sorry for the wonky focus of this photo I was trying out Mr. Mayhem's new 50mm prime lens. I don't quite have the technique down yet.

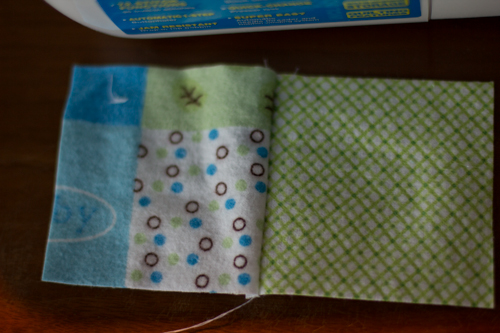
Once you have all your squares cut, sew two of them right sides together.

IMG_3144.jpg

You end up with this.

IMG_3145.jpg

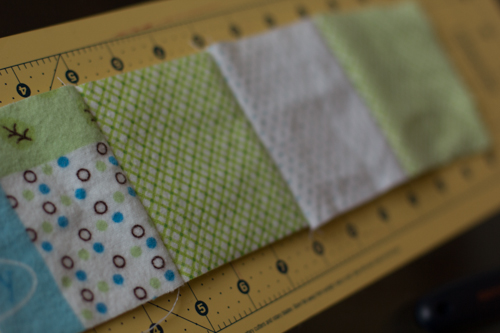
Continue in that fashion until you have four in a row (you need 6 total for each block).

IMG_3146.jpg

Again with the 50mm lens...sorry. Now, sew one square on each side to make it look like a "T". Remember to keep right sides together.

IMG_3149.jpg

At this point you are going to start making the cube. Keep sewing right sides together until you end up with this.

IMG_3150.jpg

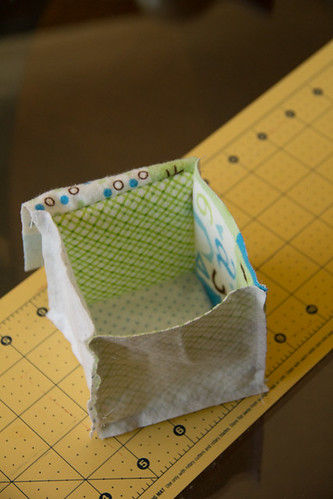
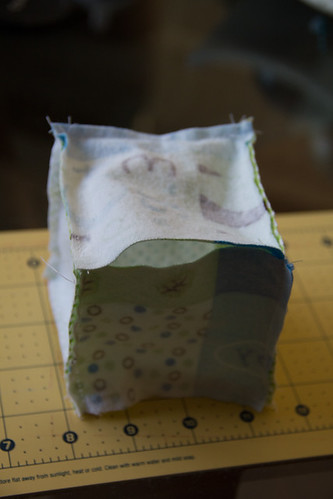
Sew two more sides, but be sure to leave one open to get the foam into. I did sew a little ways on both sides on the machine to get nice corners, but I left a 2 1/2" gap in the middle to stuff the foam through.

IMG_3151.jpg

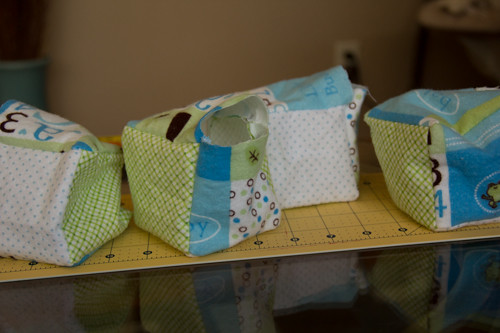
Turn the block right side out! They already look cute.

IMG_3153.jpg

 Now it is time to cut the foam. I have been told that the best way to cut it is with an electric knife. I don't have one, so I had to improvise. I used the most fine tooth saw blade I could find from Mr. Mayhem's hacksaw. It worked like a charm. If it is just a serrated knife the foam will be cut jagged and the blocks won't be perfectly square.

IMG_3161.jpg

I drew a line at 3" on both sides then Mr. Mayhem and I each took an end of the saw blade and pulled it back and forth slowly making sure it was lined up the whole time. I felt like I was cutting down a tree in the olden days. I even said "Timber!" in my head each time we reached the end of the foam.

I stuffed the foam in the felt and hand stiched them shut. I don't have pictures of the last two steps. Bad blogger...

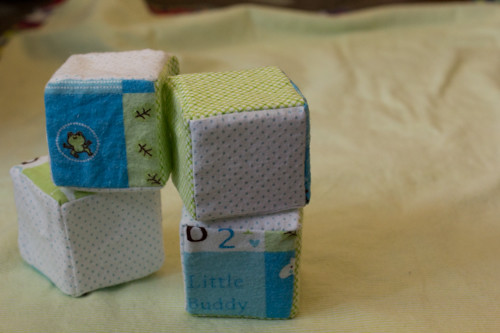
Here is the finished product.

IMG_3177.jpg

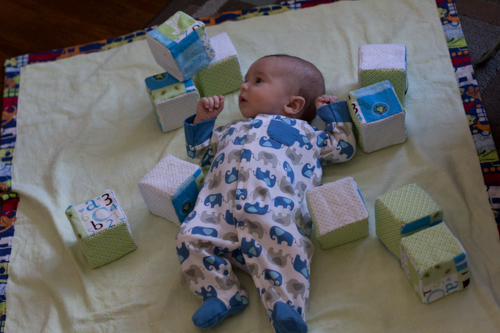
Max is a little too young to interact with them too much, but he seems interested and I'm sure as he gets older he will have lots of fun with them!

IMG_3195.jpg

This was a great project to break in my new sewing machine. It was quick, easy, turned out cute, and it was pretty cheap too. I got the foam at hobby lobby with a 40% off coupon for $3.50 and the fabric was 60% off at JoAnn so my total there was $3.19. All in all I would call it a success.

Love,
Natalie

Saturday, December 1, 2012

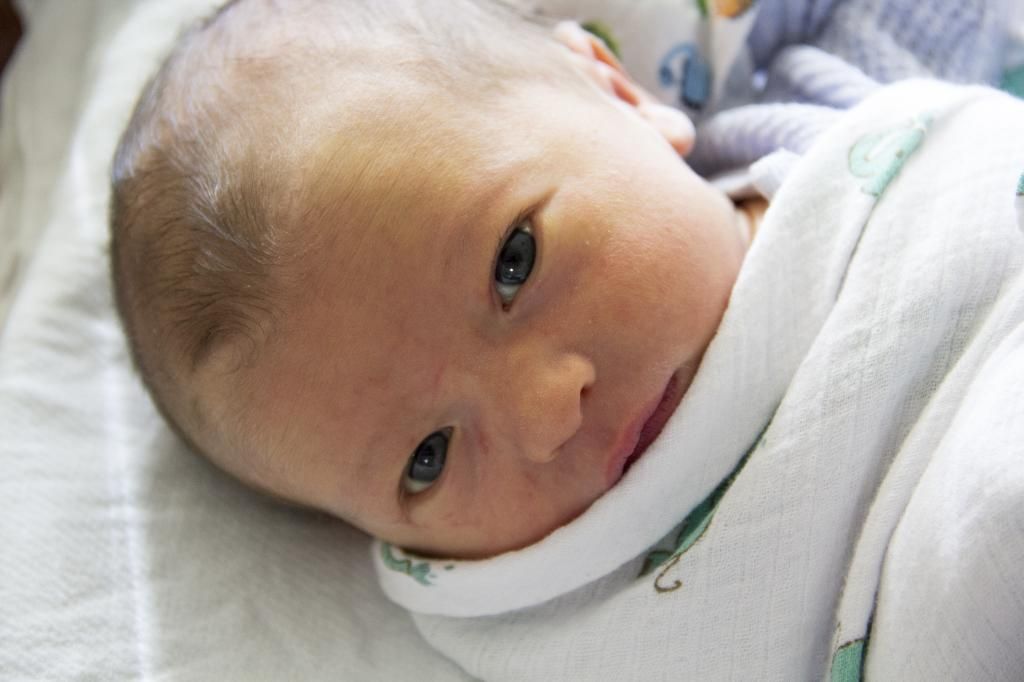
Baby Mayhem has arrived!

Maximus Ryan
November 11, 2012
7lbs 9.9oz 20in
 

Looks like we finished up the nursery just in time. Two days after I posted the nursery reveal Max was born! It was 5 days before his due date. We were really surprised because I had it in my head that as a first time mom I was sure to go over due. Mr. Mayhem had a HUGE project going at work on the day of Max's birth. Luckily he had some great people who he had trained that could cover for him, so he didn't miss a thing. Before I went into labor we both joked, "the 11th would be the worst day for the baby to be born." Oops! Also it seems that my nesting takes a different form than most women. On the day I went into labor I was outside cleaning up all my flower beds for the winter. I guess instead of cleaning and organizing inside the house, I felt the need to get the yard ready for the little one. 

I started having contractions the night of the 10th around 10:30. We went to the hospital a little after midnight and I got my epidural around 2am. The nurses said that I should be pushing by 8am and have him by lunch. Things did not progress that way and after 20 hours of labor, the doctor suggested a C-section for three reasons: 1) he was face up and she couldn't turn him 2) he was crooked 3) he has a large head. The c-section went well, and we met our little boy at 7:06PM on the 11th. We are both in love, but healing from a c-section has not been much fun. I'll be back soon with more pictures of my favorite baby!

Love,
Natalie

Friday, November 9, 2012

Minion Nursery Complete!

Well folks, with just one week to D-day (AKA My due date) the count down is nearing completion. Luckily for me the nursery project has already  been completed. Mr. Mayhem and I had fun using our new camera (our biggest baby splurge!) to take some nice photos of our hard work. 

We are so happy with how everything came together. It really puts a new mama's heart at ease to know that she has a safe, calming, and comfortable place to bring her newborn home to. 

This first photo is the view as you come in the door. The crib is to the right and the closet is to the left. 


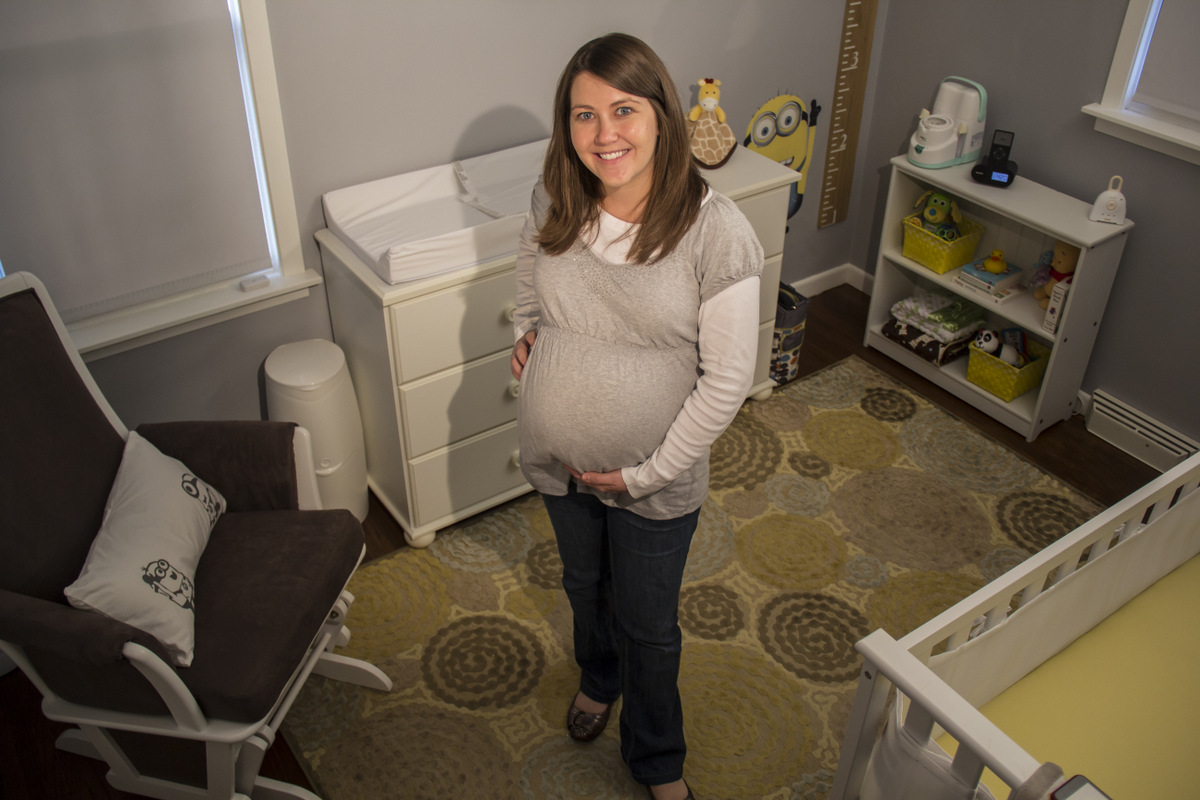
Mr. Mayhem decided that the baby and I needed to be included in the photo shoot. I think this angle gives a good idea of the layout of the room. Remember this first nursery post where I was hell bent on changing the rug? Surprise...it ended up working, and I love it in the space. Amazing how things just work out some times.


Here is the view of the other side of the room. His bed looks so empty, but from what I have read that is the safest way for baby to sleep.  That bear on the crib makes heart beat sounds to sooth the little guy to sleep with reminiscent sounds of the womb.


We opted for a mesh bumper because we have heard concerns about babies being suffocated by the regular kind! I love the crisp white look too. It keeps it simple.


 Let's take a look at some more of the details!  You might remember this little minion from this post and the growth chart ruler from this post! They both add so much fun and interest to the space.


Mr. Mayhem built these shelves from corbels we bought at the home improvement store and some wood we found in the basement left from the previous owners. They turned out great especially considering their humble beginnings. 


Baby Mayhem's first photo got framed and put on the shelf with a little minion friend. My mom bought that minion for us not realizing that it was a Dracula minion with a cape and FANGS! I cut off the cape, but those fangs are still there and crack me up. My mom was so embarrassed when she realized in was a vampire.


We are especially excited about our new rocker glider that we got as a gift (we are so thankful for all the generous people around us!). It is so comfy and will be great to rock the little one in.  Mr. Mayhem built those book shelves on the wall as well. They are knock offs of these Ikea picture ledges. The pillow I sewed, and then Mr. Mayhem and I used this method to paint on the minions.


Like I said, the nursery is done, but that doesn't mean I don't have more ideas for the future. I think once the baby is born and we have announced his name, I will buy the letters to spell it out and intersperse them with these minions on the top shelf.  I may paint them or decoupage them with cute craft paper. You will just have to wait and see! I love the little bit of the cornice box that you can see in this picture!


Now all it needs is a baby! I will let you know when that addition happens. Any day now!

Monday, October 15, 2012

DIY Cornice Box

I'm generally a girl who knows what she wants and sets out to get it. This project is an example of that. I wanted grey and yellow chevron cornice boxes for my nursery and no one was going to tell me "No". It didn't seem like an unrealistic request at the time. Mr. Mayhem whipped up the boxes, and I covered them with batting, but then we hit a snag. I could not find a yellow and grey chevron fabric that I liked. I finally decided to settle for plain yellow chevron. I ordered it from fabric.com, and I love the fabric. It was nice, but the wrong shade of yellow for the nursery. Too mustard. Nice, but not right. Then, I decided to settle again and go for grey chevron. It would be an easier color to match/coordinate with the room.  I found the perfect grey chevron fabric here in town at Hobby Lobby! I decided to wait to buy it until my mom was in town and she could help me finish the cornice boxes. Low and behold, when we went to get the fabric, they were sold out and the warehouse was out of stock as well...sad day. But then standing amongst the crafting supplies lamenting my decision not to buy the fabric the week before when it was it stock, an idea hit me. Paint your own chevron pattern. My mom looked at me like I had a screw loose (I probably do), but she helped me pick out white fabric, acrylic paint, and textile medium. When I got home and announced to Mr. Mayhem what I was planning to do, he rolled his eyes, then rolled up his sleeves to help me. He's a good man.


First, I washed and dried the fabric. Then I cut it to fit the previously constructed boxes. 


This is not really a step in the process, but I like this 3 4 generations photo. My grandma is working a crossword puzzle, my mom is hemming my maternity pants, I'm ironing the fabric, and the baby is just hanging out (probably having the hiccups. They are his favorite way to pester mom :-))


Then the complicated part started. We had to measure and do math...blah! Luckily Mr. Mayhem did most of the figuring. We decided we wanted 5 in. chevrons and each chevron would be 3/4 in. wide. We decided 3/4 because that was the width of our tape. We went along the fabric pinning each place the tip of a chevron would be using a measuring tape.


As you can see, we used a lot of pins. Then, we used frog tape to tape between the pins and reveal our chevron pattern.


I'm not going to lie. It took forever. Especially since we had two pieces of fabric to do.


This is what it looked like when all the tape was applied. I would wholeheartedly recommend frog tape. It is easy to work with and provides a great seal--even on fabric. I had never tried it on fabric before.


Then, I painted my pattern. Two yellow stripes, one grey stripe. I used Anita's acrylic craft paint mixed 2 parts paint, one part textile medium.


We let it dry a little, but not all the way, then we carefully peeled off the tape.


This is what we were left with. Perfect chevron fabric, in the perfect colors for the nursery. Lots of work, but worth it. The rest of the project went as smoothly as planned.


Let's back up a bit to the construction of the boxes. It is really fairly simple. We bought a piece of 10"x 1/2" pine. I don't remember the length, but it is not really important because you would need to get the right size for your window anyway. We made them to extend just a few inches passed the window trim and jut out from the wall 4". 

We drilled and counter sunk three screws on each corner. 


We also attached some L brackets to hang them with. Pine is a really good wood for this project because it is very light.

Now that we had the fabric and the boxes finished, we were ready to put it all together. We simply stapled batting then the fabric around the boxes. We were careful to pull the corners tight and make sure everything was straight and wrinkle free.


Then we hung them up! I love them! What a great touch of color and fun to our little guys nursery. This is a good picture to see how far out they jut from the wall. We picked 4" in case we ever want to add curtains underneath. We would need 4" for a curtain rod.


The other window.


Just a few more touches and the nursery will be all set for little Mayhem's arrival! Can't wait!


Saturday, October 13, 2012

Freezer Paper Painting--Minion Pillow

Hello blog friends! We have been making quite a bit of progress putting together our minion nursery for our little guy. I'm 35 weeks pregnant, so it's about time to wrap things up. We hope to finish hanging some shelves and order a chair this week. Once those are in place, I will give you the grand tour, but for now I want to share a fun project the Mr. and I worked on yesterday. We made this pillow!

The technique is called freezer paper painting. I found a nice tutorial of it on this blog.  We finished our project, and Mr. Mayhem looked at me and said, "When do we put it in the freezer?" So I will take this opportunity to point out that you will not actually use the freezer, just freezer paper. ;-)

As you may or may not know there is no minion fabric in existence. Hence, the need to create my own. I started with plain white canvas/denim type fabric. I sewed a pillow case to fit my pillow form. I am probably the most amateur sewer on the planet, so I did not create a tutorial for that. I'm sure there are lots of good ones out there if you need it. 

We started with a minion image from the interweb. Mr. Mayhem worked his computer magic to simplify it into something we could cut out. Then we placed freezer paper over it and carefully cut around the design with a sharp razor blade knife. 


In case you don't know what freezer paper is. (Mr. Mayhem didn't) It is in the ziplock bag aisle at Wal-Mart. 
 

I didn't get any pictures of the cutting process, but this is what we were left with. It is important to remember that you want to remove the black part, not the white part. You are creating a stencil.


Once we had our images cut out we ironed them on to the pre-washed pillow cover that I had sewn.  Put some sort of fabric between the paper and the iron. We used an old pillow case. I would also like to stress here: DO NOT USE STEAM!!! It must be a dry iron or your paper will be wrinkly and not provide a good seal. We experienced this. Pictures to follow.


 Once the image is adhered to the fabric you are ready to paint. There are two options for paint. 1)Buy fabric paint. 2) (what I did) Use regular acrylic craft paint with some textile medium mixed in. Either way you will be able to wash your project with out the paint washing off. I used Anita's textile medium and paints.


You simply mix in 2 parts paint to 1 part medium. Easy. It does make the paint a little bit more runny than with out it, but we didn't have a problem.


Carefully paint inside the stencil. I painted this minion because it was ironed correctly and therefore easy to paint.


Mr. Mayhem painted this minion because it was the one that we had used steam on. You can see how wrinkly it was. He carefully painted to make sure no paint seeped under the stencil.


Good work, honey!


 After we finished painting yellow, we decided that we didn't like it. It was too close to the white, and we didn't think it would stand out enough. Luckily we hadn't removed the stencils yet, so we just painted over it with grey paint mixed with the textile medium.


When the paint was dry, we carefully peeled away the freezer paper. We were left with our cute design! 


 Here it is in the current nursery chair. We will hopefully be swapping it for a glider rocker this week or next.  I love how the pillow turned out. It is simple, but cute and special. It really coordinates with everything in the room and does a nice job bringing the theme to this corner.


To catch up on other nursery projects so far go here, here, and here.