
My sister picked out this charming set of juice glasses.

A blank canvas just waiting for creativity to strike!

I chose a bowl. I am slightly obsessed with popcorn especially when there are m&m's involved, so I decided it would be my "popcorn bowl."

The supplies you will need are as follows:
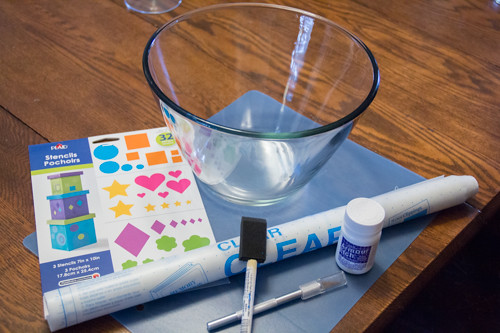
Something to etch, contact paper, glass etching cream, a foam brush, a craft knife, cutting board, and stencils (if desired).
Decide on your design, and cut it out of contact paper. Remember what you cover will not be etched, what you leave open will.
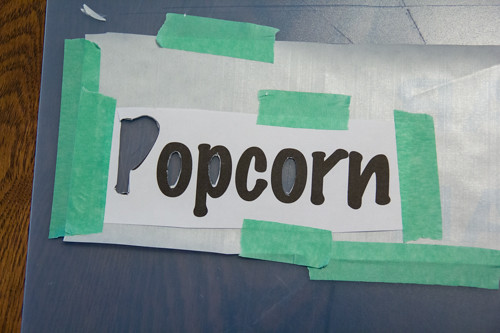
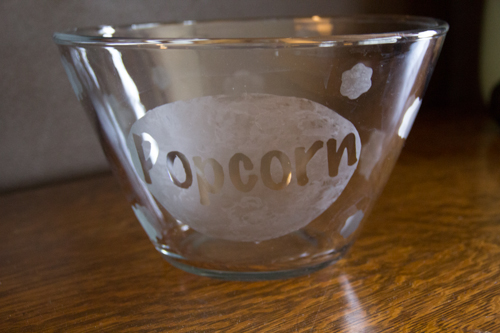
I decided to put the word "popcorn" on the side of my bowl with a circle around it. So I printed the letters on the computer, then taped them to the contact paper and cut them out with the craft knife.
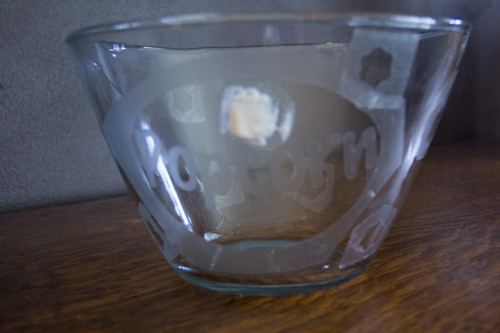
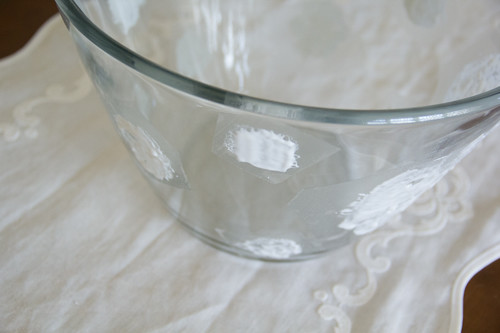
I forgot to take a picture of the bowl before I put any cream on, but here is one with a little bit of cream on the back. As you can see I put contact paper over the word popcorn, so it will not be etched the area around it will.
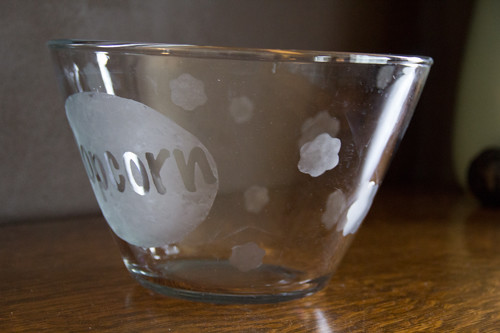
I used the flower stencil around the rest of the bowl to look like little pieces of popcorn. The background of this picture cracks me up. I'm a messy crafter!
After you get all your contact paper placed, liberally apply the cream and let it set for about 30 minutes. The cream bottle said 10 min, but that didn't seem long enough to me. Be careful not to get the cream on you skin or in your eyes and don't eat it. It is acid.
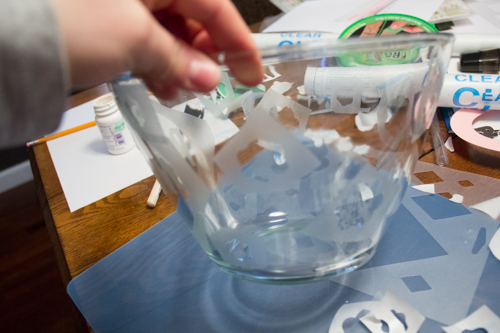
After you let it set, rinse off the cream and remove the contact paper.

The finished product. It was quite hard to photograph since there is design on the front and back of the bowl. Overall I like the bowl. I don't love it. I've never done such a large section of etching before and I don't think I will again. It looks better in smaller sections. I love the little popcorn pieces, not crazy about the circle around the word popcorn.
Here's another angle. Aren't the little popcorns charming.
My sister followed the "smaller area" rule and had striking success.
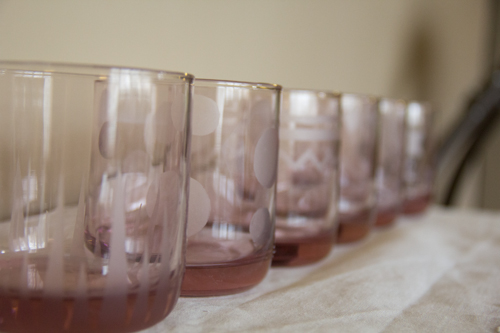
She did a different design on each glass.
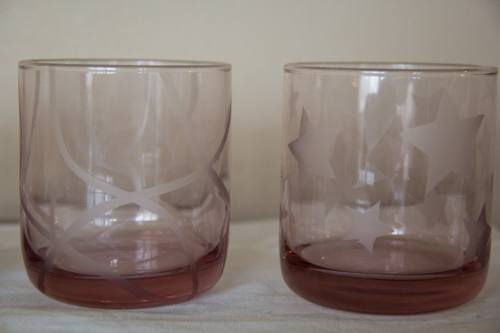
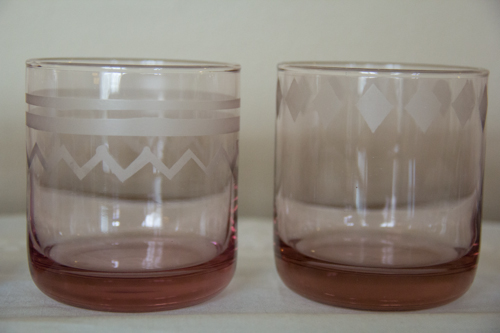

It makes a very cute set of juice glasses. Good job, sis!

While my bowl didn't turn out perfect, I had a fun time crafting with my sis. We had plenty of time to chat while cutting out our designs. My bowl was done before nap time was over, however, since she decided to do 6 glasses, her took a bit longer! I hope this tutorial yields better results for you than it did for me. That's one of the benefits to being a reader, not a blogger, you can learn from my mistakes. :-)
I just bought an olive oil bottle for my kitchen dish soap - I wanted to do this to it but wasn't sure how to - I will have to try it out :) I think your bowl looks pretty cute! love the glasses!
ReplyDeleteI like this! Now that my kids are back in school, I'm going to try it. Thanks for the inspiration:)
ReplyDelete